A cutting is a living piece of its parent plant. Until it makes roots, it has limited access to water and must rely on the conditions you provide. A clean setup, an appropriate rooting medium and consistent attention matter as much as the product you choose.
This guide follows a small batch of stem cuttings from preparation to transplanting. It is written for ordinary home and greenhouse propagation. Plants differ in the type of cutting they need, the season in which they respond and the time they take to root. Check guidance for your particular plant before you cut, and follow the label on every propagation product.
1. Plan the batch before taking cuttings
Start with the plant, not with the bottle. Identify what you want to propagate and whether stem cuttings are a suitable method. Some plants are commonly divided, grown from seed or propagated from leaves instead. A method that works well for a soft green stem may need adjustment for firmer, woody growth.
Look for a healthy parent plant with vigorous growth and no obvious pest or disease problem. Inspect the undersides of leaves as well as the newest shoots. Propagation preserves the characteristics of the material you select, but it can also carry problems into the next batch. Avoid taking cuttings from a plant that is severely wilted or struggling after a recent move.
Decide how many cuttings you can accommodate without crowding them. A tray with spare space is easier to inspect than one packed tightly with overlapping leaves. Prepare labels before the work begins. Record the plant name and the date, and keep different varieties separate even if their cuttings look alike.
Set a realistic aim for the first batch: learning how that plant responds in your conditions. Do not judge every cutting against a fixed rooting deadline. Stem maturity, temperature, light, water and the plant itself can all affect the result. A simple notebook makes the next attempt more informative.
2. Set up a clean propagation space
Have the tray, rooting medium, cutting tool, plant labels, water and any chosen products ready before removing plant material. Fresh cuttings should spend as little time as practical drying on a work surface. Put everything within reach so that you can move from cutting to treatment to planting without searching for equipment.
Use a clean, sharp cutting tool that makes a controlled cut. Ragged or crushed tissue is harder to handle and gives you less control over the cutting. Clean tools between plants, especially when you notice anything that could indicate a pest or disease. Follow the tool manufacturer's care instructions and the directions for any cleaning product.
Choose a washable surface and remove old plant debris. Reused trays and containers should be cleaned before the new batch starts. Do not assume that a tray is ready simply because it looks dry. Inspect drainage openings and remove roots or growing medium left from the previous use.
Separate your clean supplies from discarded leaves and stems. A small waste container beside the bench helps keep offcuts away from the working area. Keep concentrated products in their original containers with their labels intact. Use a dedicated measuring tool, and store propagation supplies away from food preparation areas and children.
3. Prepare the rooting medium
The rooting medium needs to hold the cutting upright while providing a useful balance of moisture and air. Choose a medium intended for propagation and suitable for the plant. Starter cubes, appropriate soilless mixes and other propagation materials have different preparation requirements. Read those instructions before adding water or nutrients.
Moisten the medium evenly and allow excess water to drain. A medium that is dry in the middle can leave the stem without enough moisture even when the surface looks wet. At the other extreme, standing water around a tray can keep the rooting area too wet. Check the container as well as the medium.
Make planting holes before treating the cuttings. The hole should accept the stem without forcing it through a dense surface. This is especially useful when applying rooting gel, because pushing a treated stem directly through compacted material can wipe away the coating you have just applied.
Arrange the tray where it will actually be maintained. A bright kitchen window and a controlled propagation shelf can behave very differently during the day. Consider changes in direct sunlight, nearby heaters and air movement. Plan how you will inspect moisture and remove excess water without disturbing the stems.
4. Select and prepare the stem
Take cuttings from suitable growth on the parent plant. Locate the nodes, the points where leaves or side shoots meet the stem. Many common stem-cutting methods place the lower cut near a node, but the appropriate length and maturity depend on the plant. Use species-specific instructions instead of treating one measurement as universal.
Remove leaves that would sit beneath the surface of the rooting medium. Buried leaves can decay and make the planting area harder to keep clean. Leave an appropriate amount of foliage above the surface so that the cutting can continue functioning without filling the tray with overlapping leaves.
Handle the stem gently and avoid repeatedly touching the cut end. Work with a manageable number of cuttings at a time. If you are preparing several plants, finish and label one group before starting the next. This prevents mistakes that become difficult to identify once every stem is standing in a similar cube.
Do not add extra wounds or remove large amounts of leaf tissue simply because you have seen another grower do it. Those choices depend on the species and method. Begin with a sound propagation technique for the plant you have, then change one variable at a time when you have a reason to do so.
5. Use rooting gel at the cut stem
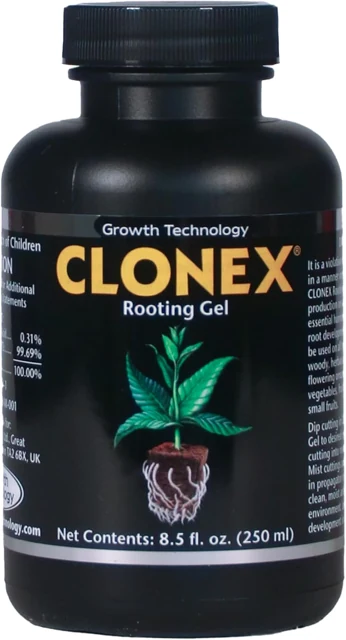
Clonex Rooting Gel is a water-based rooting product used on the cut end of a stem. Its role is different from that of a nutrient solution added to irrigation water or a spray applied to foliage. Keeping those three jobs separate makes the process easier to follow.
Pour a small working amount into a clean container. Dip according to the directions on the product label, then place the treated cutting into the prepared hole. Keep the original bottle closed while you work. Do not return used gel to the bottle, since material from the working container can introduce contamination.
Support the stem by gently bringing the medium into contact around it. The goal is a stable cutting, not a tightly compressed block. Check that the stem remains upright and that its leaves are clear of the medium. Label it immediately if there is any chance that varieties could become mixed.
Choose a bottle size that suits your routine. More product does not mean that an individual cutting needs a heavier treatment. A larger bottle makes sense when you run repeated batches, but good handling and storage still matter each time you open it. Keep the label available rather than relying on memory.
6. Understand where foliar mist fits
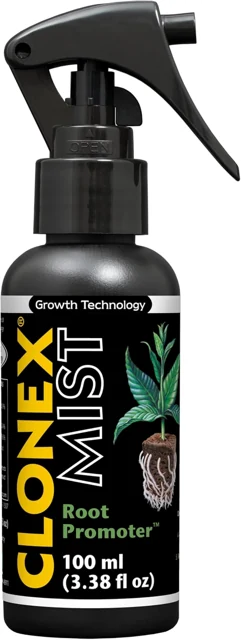
Clonex Mist is a separate, ready-to-use foliar product for stock plants and cuttings. The 100 ml and 750 ml spray bottles serve the same application role in different quantities. They are not bottles of rooting gel, and they should not be used as though they were interchangeable with a gel treatment.
Use the spray according to its label. A fine application to foliage is different from soaking the rooting medium. Watch where the spray lands and keep the work area tidy. Do not combine several products in the bottle or add a concentrate to a ready-to-use product unless its directions specifically call for that.
Keep foliar care separate from your assessment of the tray's moisture. Wet leaves do not tell you whether a starter cube is evenly moist, and a moist cube does not tell you whether foliage is receiving appropriate care. Look at both parts of the setup during your checks.
A sprayer is also not a substitute for a suitable propagation environment. If cuttings are exposed to harsh light, dry drafts or poor drainage, simply spraying more often may not resolve the underlying problem. Review the whole setup before adding another application to your routine.
7. Distinguish nutrition from rooting treatment
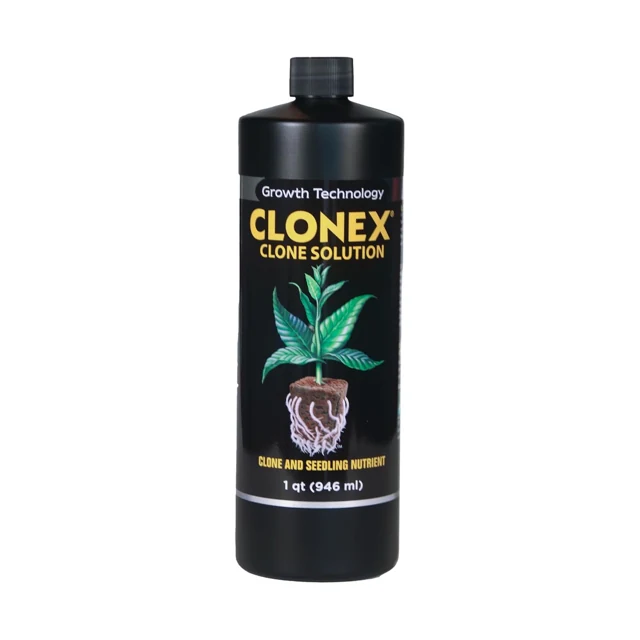
Clonex Clone Solution supplies nutrition for clones and seedlings. It is a concentrate for dilution, so it belongs with your measuring and watering tools. The quart and gallon formats differ in the amount supplied. Select the format that matches how often you prepare nutrient solution and how much you can store sensibly.
Read the directions on the bottle before mixing. Measure the water and concentrate with appropriate equipment; do not estimate a small dose by eye. Label any prepared container so that it cannot be confused with plain water or another product. Keep food and drink containers out of this process.
Mix only what you need for your planned use and follow the product's handling guidance. Different propagation systems have different management requirements. A hand-watered starter tray, an aeroponic cloner and a hydroponic system should not be treated as identical simply because the same nutrient product can be relevant to more than one.
Keep records of what you mixed and how the plants responded. If you already follow a nutrient program, check how the new product fits before adding it. More concentrated feeding is not automatically better for a young plant. A clear, repeatable approach is easier to evaluate than several simultaneous changes.
8. Manage light, moisture and air together
Fresh cuttings need an environment suited to plants that have not yet established roots. Bright, indirect light is a common starting point for many home propagation methods. Strong direct sun can heat a covered tray quickly. Position the setup with the full day in mind, including the hours when you are not watching it.
A humidity cover can help limit moisture loss in appropriate setups, but it changes the environment inside the tray. Observe condensation, leaf condition and the moisture in the medium. Follow the cover or system instructions for ventilation. Do not assume that keeping a cover completely closed is always the best choice.
Check the medium directly instead of watering on a rigid schedule. Its needs depend on the material, container, temperature and airflow. Lift a tray or inspect a spare cube to learn how it feels at different moisture levels. Add water thoughtfully and let excess drain rather than allowing the container to stand in it.
Keep the setup away from abrupt temperature swings and strong drafts. If you use a propagation mat or lighting equipment, follow its instructions and check actual conditions at tray level. The room temperature alone may not describe what is happening under a cover or immediately above a heated surface.
9. Observe without repeatedly disturbing roots
Check the batch regularly, but avoid lifting every stem to see what is happening below the surface. New roots can be delicate, and frequent disturbance makes their progress harder to assess. Look for visible roots at the edge of a cube or through an appropriate container when the setup allows it.
Leaf appearance gives useful clues, but a new leaf alone is not proof of a fully established root system. Compare several observations: the condition of the foliage, the stability of the cutting, visible roots and the time since planting. Use the plant's expected propagation behavior as context.
Remove fallen leaves and inspect any cutting that deteriorates. A soft, darkening stem base or persistent collapse deserves attention. Separate affected material when appropriate and review drainage, hygiene and conditions. Avoid treating every problem as a sign that the batch needs more rooting product.
Record what you see in simple language. Notes such as "surface dry, cube still moist" or "roots visible at one corner" are more useful than a general impression that a tray looks good or bad. Photographs taken from the same position can help you compare progress without moving the plants.
10. Move rooted plants on with care
Transplant when the cutting has developed enough roots for the next stage, using guidance appropriate to the plant and medium. A single root tip does not necessarily mean a plant is ready for a large container or a sudden move outdoors. Prepare the destination before lifting the rooted cutting.
Choose an appropriate pot and growing medium with drainage. Handle a rooted cube or plug by its supporting material rather than pulling the stem. Position the plant carefully, fill around it as required and settle the medium according to the method you are using. Keep labels with their plants.
Changes in light and humidity should be considered part of transplanting. A plant that has spent its early days under a cover may need a gradual transition to less protected conditions. Watch its response and avoid combining several abrupt changes, such as stronger light, lower humidity and a major temperature shift.
Continue the care program appropriate to the now-rooted plant. Propagation products have particular roles and directions; they are not a reason to keep every early-stage treatment in place indefinitely. Read the label for when an application should stop or change, and move toward the plant's normal growing routine.
Keep the next session ready
At the end of a propagation session, close each original container and return it to the storage conditions on its label. Wipe spills from the outside before putting a bottle away. Keep measuring tools and working containers clean, dry and separate from the main supply.
Before the next session, read the label again and inspect the container. Check any printed use-by information and follow the manufacturer's guidance if the contents or packaging appear to have changed. Do not transfer a product into an unmarked bottle, even when the replacement container seems more convenient.
Store labels and brief batch notes together. Write down the product format, the amount of water prepared for a concentrate and the date the cuttings were taken. These small details help distinguish a change in your method from a change in the plant material. They also make it easier to repeat a successful routine without guessing what you did last time.
A practical troubleshooting check
When a batch struggles, begin with observations you can verify. Has the medium stayed wet for a long time? Does the tray receive direct afternoon sun? Were the parent plants healthy? Are the product directions being followed? Answering those questions is more useful than adding several remedies at once.
| What you notice | What to check first | Next useful step |
|---|---|---|
| Cuttings wilt soon after planting | Handling time, light exposure and moisture | Review the environment and the plant's propagation method. |
| Medium stays saturated | Drainage openings and standing water | Let excess water drain and reassess watering. |
| Uneven results in one tray | Stem maturity, position and variety | Compare labels and conditions across the tray. |
| Little visible progress | Species expectations and cutting health | Observe carefully without repeatedly pulling stems out. |
Change one relevant variable at a time where possible. If you alter the medium, lighting, feeding and humidity together, it becomes difficult to know what helped. Keep useful records from both successful and unsuccessful batches. The purpose is to make your method repeatable for the plants and space you actually have.
For the next batch, start by checking supplies and choosing the product for its job: gel for treating the cut stem, Mist for the foliar application described on its label, or Clone Solution for diluted nutrition. Keep the workflow simple enough that each step can be done carefully.